Beginner Woodworking Tools: The Only 7 You Actually Need (And What to Skip for Now)
TL;DR
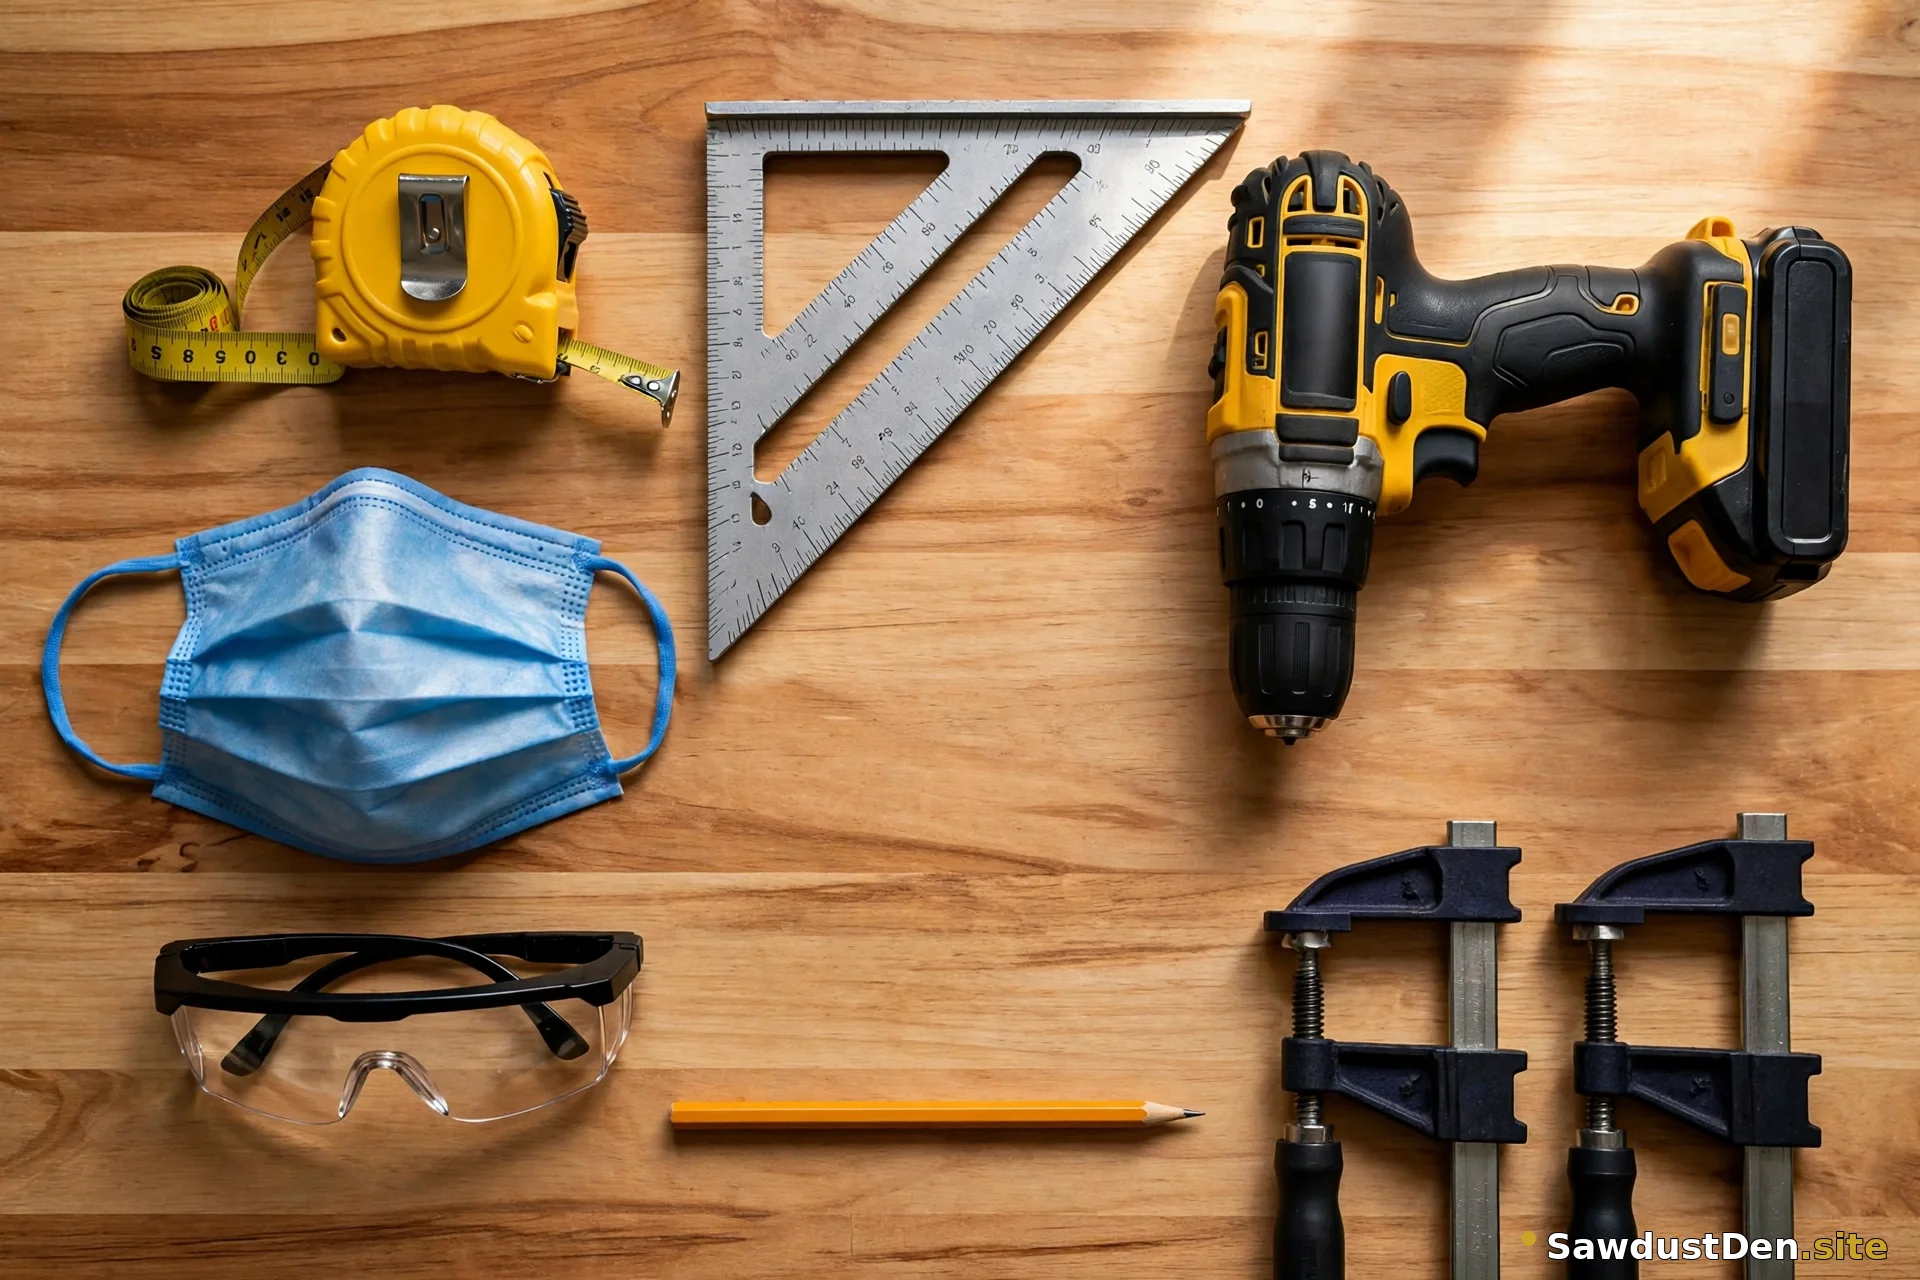
Beginner woodworking tools: you do not need a full workshop to start woodworking. You need seven things: a tape measure, a speed square, a pencil, a drill/driver, a pair of clamps, safety glasses, and a dust mask. Buy them in that order, build your first shelf, and only then buy a saw and a sander. Everything else — table saw, router table, jointer, a full chisel set — can wait until your second or third project, and waiting will save you real money.
In this guide
- The 7 tools, in buy order
- What to skip for now (and why)
- Hand tools or power tools?
- The missing piece: a saw
- Safety notes, tool by tool
- Your first build with these 7
- FAQ
Why every list disagrees (and why this one is different)
Search for beginner woodworking tools and you will get five lists that do not agree with each other. One says five tools, one says seven, one says eight, one says fifteen. The problem is not that any of them are wrong. It is that none of them answer the question a beginner actually has: in what order do I buy, and what can wait until my second project?
This guide answers that question. It ties every tool to a real first build, it tells you what to skip, and it is honest about the one gap in the list: there is no saw in the seven, and you need a plan for that. Read that section before you buy anything.
The 7 tools, in buy order
These are the seven. Buy them in this order, and you can build a simple shelf with boards cut to size.
1. Tape measure
The tool you will touch on every single project. Get one that locks, with a belt clip, and a blade wide enough to stay rigid for a few feet when you hold it out. Cheap tapes with floppy blades make measuring a two-person job. Safety note: keep your fingers clear when the blade retracts, and never let it snap back at your face.
2. Speed square
A small triangle that does three jobs: marking square lines, marking 45-degree lines, and guiding a saw. It is the cheapest accuracy upgrade a beginner can buy. Hold it tight against the edge of the board, mark against it, and your cuts will start square instead of roughly square. Safety note: keep it flat on the board while you mark, not balanced on an edge.
3. Pencil
A regular carpenter’s pencil is fine, and so is a sharp standard pencil. The rule matters more than the pencil: mark the waste side of every cut with an X, and mark which face of the board is your good face. Most beginner mistakes start as marking mistakes, not cutting mistakes. A marking knife gives a crisper line later, but a pencil is enough for your first build.
4. Drill/driver
One tool that drills holes and drives screws. If you buy one power tool first, make it this one. Get one with a clutch (the numbered ring near the chuck) so you can stop stripping screws, and keep two bits handy: a drill bit for pilot holes and a driver bit that matches your screws. Safety note: clamp the work before you drill, never hold a small board in your hand while drilling into it.
5. A pair of clamps
Two clamps will change your work more than almost any other purchase. They hold boards still while you drill, hold a glue-up together while it dries, and act as a second pair of hands. Spring clamps are handy for light holding, but bar clamps or trigger clamps hold with real force. Buy two to start; you will buy more later, and that is normal. Safety note: a clamped board cannot spin, kick, or slide the way a hand-held board can.
6. Safety glasses
Not sunglasses, not reading glasses — proper safety glasses that wrap a little at the sides. Sawdust, a snapped drill bit, and a flying screw head all go straight for your eyes. Put them on before the first cut, not after the first scare. Keep them where your tools are, so reaching for them is part of starting work, not an extra step.
7. Dust mask
Sanding and cutting make fine dust, and fine dust is the part you do not see. A basic N95-style mask is enough for sanding and sawing softwood, and it costs very little. Wear it for sanding and for any cutting, even a quick cut. If you can see dust in the light, you are already breathing it.
That is the seven. Tape measure, speed square, pencil, drill/driver, clamps, safety glasses, dust mask. With boards cut to size, that kit builds a shelf, and it builds it well.
What comes next (not counted in the seven)
Once the first build is done, buy in this order.
Tier 2, for your second project: a circular saw or a jigsaw, and a random orbital sander. A circular saw cuts long straight lines fast. A jigsaw cuts curves and is easier to control in a small space. Pick the one that matches the projects you actually want to build, not the one a list told you to buy. The sander comes with it, because hand-sanding a whole project gets old fast, and a random orbital sander leaves far fewer swirl marks than a sheet sander.
Tier 3, later: a pocket-hole jig, a small set of chisels, and a hand plane. All three are genuinely useful. None of them are needed for a first shelf, a cutting board, or a plant stand, and buying them first is how beginners end up with a drawer of tools and no finished project.
What to skip for now (and why)
Table saw: the most useful stationary tool in woodworking, and the wrong first buy. It costs more than the rest of this list combined, it needs floor space and dust control, and it demands respect that a beginner has not built yet. A circular saw with a straightedge guide does the same first cuts for far less money and space.
Router table: a router is a shaping tool, not a joining tool. Your first projects join with screws and glue, not routed profiles. Skip it until a project actually needs a rounded edge or a groove you cannot make another way.
Jointer: it flattens faces and edges, which matters when you mill rough lumber. Beginners buy surfaced boards, not rough lumber, so a jointer would sit unused. Skip it.
Full chisel sets: a full set looks impressive and mostly gathers dust. One or two sharp chisels, bought later for a specific job like cleaning out a joint, beat a dull set of eight. Sharp matters more than many.
Skipping is not settling. It is sequencing. Buy the tool when a project needs it, and you will know exactly why you bought it.
Hand tools or power tools?
You can build the same first shelf either way, and the choice mostly comes down to space, noise, and budget.
The hand-tool path uses a handsaw, a drill/driver for screws, and sandpaper instead of a power sander. It is quieter, cheaper, and friendlier to a small apartment or a shared garage. It is also slower, and long straight cuts by hand take practice to keep square. Use the speed square as a saw guide and take your time.
The power-tool path adds a circular saw or jigsaw and a random orbital sander. It is faster, and it handles bigger boards with less effort. It is louder, dustier, and needs a bit more space to work safely, plus a mask and hearing protection for longer sessions.
Neither path is more “real” woodworking. Pick the one that fits your space and your neighbours, build the shelf, and let the next project decide what you buy next.
The missing piece: a saw
Here is the honest gap in the seven: none of them cut a board to length. That is deliberate, because a saw is the one tool where the right choice depends on your space and your projects, and it is also the easiest one to work around for a first build.
For your first shelf, get your boards cut at the store. Most hardware stores will cut boards to length, often for a small fee or free with purchase. Bring your cut list, have them cut the shelf board, the brackets, and the cleat, and take the pieces home ready to assemble with your seven tools.
If you would rather cut at home from the start, add a simple handsaw as your first cutting tool. It is cheap, quiet, and safe to learn on, and it pairs with the speed square as a guide. A circular saw or jigsaw then becomes your Tier 2 buy, when you know you want to keep building.
Do not let the missing saw stop you. A shelf built from store-cut boards, assembled square and solid, teaches you measuring, drilling, clamping, and finishing — which is the whole point of a first project.
Safety notes, tool by tool
- Tape measure: control the retracting blade; keep fingers clear of the hook end.
- Speed square: hold it flat and tight against the board edge before marking or guiding.
- Pencil: mark the waste side with an X on every cut, so you never cut the wrong side.
- Drill/driver: clamp the work, drill pilot holes before screws near board ends, and set the clutch low to start.
- Clamps: clamp before drilling, sawing, or sanding. A moving board is how most small injuries happen.
- Safety glasses: on before the first cut, every time, even for “just one hole.”
- Dust mask: on for sanding and cutting, and keep it on until the dust settles.
- General: tie back hair, take off loose sleeves and jewellery, keep cords behind you and out of the cutting path, and know where your first-aid kit is before you start.
Your first build with these 7
Start with a simple wall shelf. It needs exactly this kit plus store-cut boards: measure and mark with the tape, square, and pencil; drill pilot holes and drive screws with the drill/driver; hold everything square with clamps while the screws go in; wear glasses and a mask throughout. Browse the Beginner Projects section for the full shelf guide with its cut list, and when you are ready for the next build, the same seven tools carry over to a cutting board and a plant stand.
If you get stuck choosing between two tools, or a step in a guide does not make sense, send a message through the Contact page and we will help you sort it out.
FAQ
Can I start with only hand tools?
Yes. A handsaw, a drill/driver for screws, sandpaper, and the rest of the seven will build a shelf, a cutting board, and a plant stand. Power tools speed things up later, but they are not a requirement for starting, and hand tools are often the better choice in a small space.
What is the cheapest first kit that still works?
The seven in this guide, bought in order, with boards cut at the store. Skip the table saw, router table, jointer, and full chisel sets until a project needs them. The money you save by waiting buys better clamps and a better drill/driver, which you will use on every project.
Do I need a table saw to start?
No. A table saw is a great tool and a bad first buy. For a first shelf, store-cut boards plus a drill/driver and clamps are enough. When you start cutting full sheets or milling lumber regularly, that is when a table saw earns its place.
Which tool do I buy first if I can only buy one?
A drill/driver, if you already own a tape measure and a pencil. It drills, it drives, and it is the one power tool that shows up in every beginner project. If you own nothing at all, start with the tape measure and speed square, because accurate marking comes before every other step.
Do I need a saw at all for my first project?
You need boards cut to length, but you do not need to own the saw that cuts them. Store cuts cover a first shelf completely. If you want to cut at home, a simple handsaw is the cheapest, quietest first saw, and a circular saw or jigsaw is the Tier 2 upgrade when you are ready.